
by ThinkCode | Sep 8, 2015 | Wordpress
Given Below is some WordPress Security Tips:-
The WordPress platform is one of the fastest, most recognizable Content Management Systems (CMS) available to website owners. It dominates over 23% market share, and has been deployed in large and small organizations alike. With its popularity have come many struggles for website owners; one such struggle is with Security.
1.Use Strong Passwords: The WordPress admin password generated whiling installing time is normally strong so there is nothing wrong with that. Username and password are the heart of your wordpress site dashboard, If password is on lower strength side it may cause into hacking or brutal attacks. So when you installed wordpress then use auto generated password or type strong or lengthy password.
2.Add a CAPTCHA on your WordPress Login: Using a simple captcha to your WordPress login page is another great way to minimize the chance of a bot/script gaining access to your site via a brute force attack.
3.Protect the ‘wp-admin’ Directory: Using .htaccess file protects your wp-admin directory.
4.Update WordPress to the Latest Release: As new WrodPress versions are released the security bugs for previous release becomes public information. WordPress could have vulnerabilities as a result of how the program is written that allow an attacker to pass HTTP arguments, bad URI strings, form input, etc, that could cause Bad Things to happen. So always update your WordPress to the latest version to make sure that you are protected against any known security bugs.
5.Hide WordPress Version: The specific WordPress version that you are using can give the attacker an upper hand in finding a way to break in. So no need to show your wordpress version to other.
6.Backup you’re Data: Always keep backups of all the important files. Take backups of your wordpress
Hope Above WordPress Security tips will help your WordPress sites
by ThinkCode | Aug 27, 2015 | Woocommerce, Wordpress
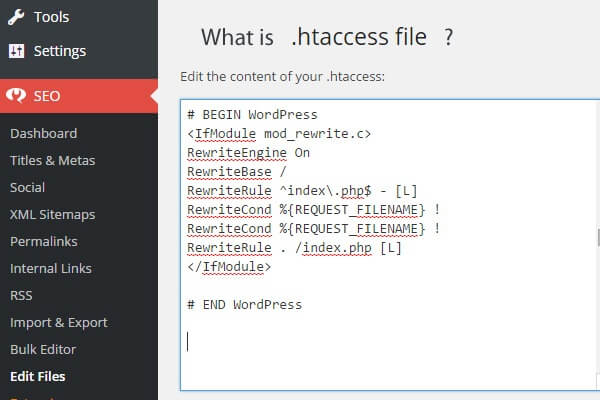
Want to know about htaccess file. Check the given below points.
- Htaccess files are configuration files used in Apache web server that controls the directory that it “lives” in–as well as all the subdirectories underneath that directory.
- They are used to override the main web server configuration for a particular directory.
- For .htaccess files to work, the main Apache web server configuration option Allow Override must be enabled.
- If the Allow Override option is not switched on, then the .htaccess file configurations will not work and the main web server configuration will be applied.
- So before applying any configuration changes using .htaccess files always check that they allow Override option is enabled.
- The user must have appropriate file permissions to access and/or edit the .htaccess file. Further, .htaccess file permissions should never allow world write access — a secure permissions setting is “644”, which allows universal read access and user-only write access. Finally, .htaccess rules apply to the parent directory and all subdirectories. Thus to apply configuration rules to an entire website, place the .htaccess file in the root directory of the site.
- Features: .htaccess file include the ability to password protect folders, ban users or allow users using IP addresses, stop directory listings, redirect users to another page or directory automatically, create and use custom error pages, change the way files with certain extensions are utilized, or even use a different file as the index file by specifying the file extension or specific file.
- NOTE:.This file are very powerful and the slightest syntax error, such as forgetting a ‘<’ character, might break the functionality of your website. Therefore before making any changes to an existing .htaccess file always make a backup first. Once you apply the changes test your website thoroughly.

by ThinkCode | Aug 27, 2015 | Wordpress
Given below is Character Definitions for htaccess
- #: the # instructs the server to ignore the line. used for including comments. each line of comments requires it’s own #. when including comments, it is good practice to use only letters, numbers, dashes, and underscores. this practice will help eliminate/avoid potential server parsing errors.
- [F]: Forbidden: instructs the server to return a 403 Forbidden to the client.
- [L]: Last rule: instructs the server to stop rewriting after the preceding directive is processed.
- [N]: Next: instructs Apache to rerun the rewrite rule until all rewriting directives have been achieved.
- [G]: Gone: instructs the server to deliver Gone (no longer exists) status message.
- [P]:Proxy: instructs server to handle requests by mod_proxy
- [C]: Chain: instructs server to chain the current rule with the previous rule.
- [R]: Redirect: instructs Apache to issue a redirect, causing the browser to request the rewritten/modified URL.
- [NC]: No Case: defines any associated argument as case-insensitive. i.e., “NC” = “No Case”.
- [PT]: Pass Through: instructs mod_rewrite to pass the rewritten URL back to Apache for further processing.
- [OR]: Or specifies a logical “or” that ties two expressions together such that either one proving true will cause the associated rule to be applied.
- [NE]: No Escape: instructs the server to parse output without escaping characters.
- [NS]: No Sub request: instructs the server to skip the directive if internal sub-request.
- [QSA]: Append Query String: directs server to add the query string to the end of the expression (URL).
- [S=x]: Skip instructs the server to skip the next “x” number of rules if a match is detected.
- [E=variable:value]: Environmental Variable: instructs the server to set the environmental variable “variable” to “value”.
- [T=MIME-type]: Mime Type: declares the mime type of the target resource.
- []: specifies a character class, in which any character within the brackets will be a match. e.g., [xyz] will match an x, y, or z.
- [] +: character class in which any combination of items within the brackets will be a match. e.g., [xyz]+ will match any number of x’s, y’s, z’s, or any combination of these characters.
- [^]: specifies not within a character class. e.g., [^xyz] will match any character that is neither x, y, nor z.
- [a-z]: a dash (-) between two characters within a character class ([]) denotes the range of characters between them. e.g., [a-zA-Z] matches all lowercase and uppercase letters from a to z.
- a{n}:specifies an exact number, n, of the preceding character. e.g., x{3} matches exactly three x’s.
- a{n,}:specifies n or more of the preceding character. e.g., x{3,} matches three or more x’s.
- a{n,m}:specifies a range of numbers, between n and m, of the preceding character. e.g., x{3,7} matches three, four, five, six, or seven x’s.
- (): used to group characters together, thereby considering them as a single unit. e.g., (perishable)? press will match press, with or without the perishable prefix.
- ^: denotes the beginning of a regex (regex = regular expression) test string. i.e., begin argument with the proceeding character.
- $: denotes the end of a regex (regex = regular expression) test string. i.e., end argument with the previous character.
- ? : declares as optional the preceding character. e.g., monzas? will match monza or monzas, while mon(za)? will match either mon or monza. i.e., x? matches zero or one of x.
- ! : declares negation. e.g., “!string” matches everything except “string”.
- . : A dot (or period) indicates any single arbitrary character.
- –: instructs “not to” rewrite the URL, as in “…domain.com.* – [F]”.
- +: matches one or more of the preceding character. e.g., G+ matches one or more G’s, while “+” will match one or more characters of any kind.
- *: matches zero or more of the preceding character. e.g., use “.*” as a wildcard.
- |: declares a logical “or” operator. for example, (x|y) matches x or y.
- :escapes special characters ( ^ $ ! . * | ). e.g., use “.” to indicate/escape a literal dot.
- .:indicates a literal dot (escaped).
- /*: zero or more slashes.
- .*: zero or more arbitrary characters.
- ^$: defines an empty string.
- ^.*$: the standard pattern for matching everything.
- [^/.]: defines one character that is neither a slash nor a dot.
- [^/.]+: defines any number of characters which contains neither slash nor dot.
- http://:this is a literal statement — in this case, the literal character string, “http://”.
- ^domain.*: defines a string that begins with the term “domain”, which then may be proceeded by any number of any characters.
- ^domain.com$: defines the exact string “domain.com”.
- -d:tests if string is an existing directory
- -f:tests if string is an existing file
- -s:tests if file in test string has a non-zero value
by ThinkCode | Aug 26, 2015 | Wordpress
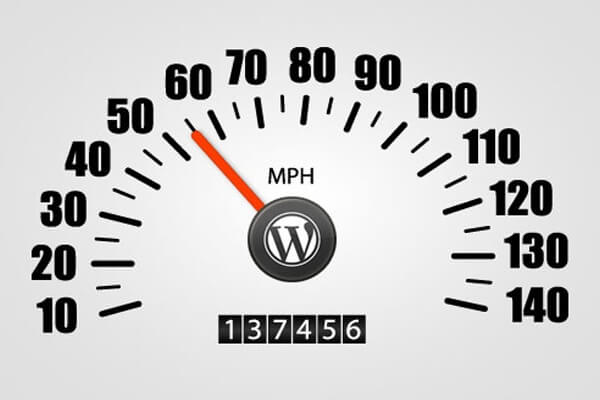
When your wordpress website is faster, it is much easier to gain more traffic and visitors.
To benefit your audience, rankings, and usability, we recommend increasing your website speed.
Let’s review this list of 23 tips to increase your site speed.
1. Cache your WordPress site.
Do you want speed now instead of later? Quick Cache is a WordPress plugin that takes a quick snapshot of every aspect of your site (including Page, Category, Posts, etc.) and stores the snapshots for quick loading.
2. Test your page load speed
You won’t know how far you need to improve your website if you don’t have a baseline. Pingdom’s Website Speed Test gives you an accurate reading on your site’s speed.
3. Choose a good hosting provider.
4. Optimize your images for speed.
We all want our websites to look engaging, but don’t do so at the cost of usability. Compress your image files in an instant with EWWW Image Optimizer for WordPress.
5. Clean up your database.
If you want to get your website running faster right this minute, start your spring cleaning a little early this year by optimizing your database. WPOptimize gets the job done. This app removes old posts, delete items in the trash, and more.
6. Limit the number of plugins you install.
Also bare in mind to delete unactivated plugins if you don’t plan on using them again.
7. Do not display the full post on the homepage.
When it comes to blogs, the less you have on your front page, the better. Shorten your blog posts using Easy Custom Auto Excerpt.
8. Remove post drafts and revisions.
Out with the old and in with the new! In this case, we mean to get rid of old posts as soon as possible using Bulk Delete, a plugin that enables you to delete post batches by status or user.
9. Make use of a content delivery network.
A content delivery network is a group of servers containing copies of data that are quickly and easily distributed to your site. A couple of excellent CDN services include MaxCDN and Incapsula to start.
10. Install the Lazy Load plugin.
The Lazy Load plugin offers a smart solution to image rendering and management. In essence, it only load images when they are visible to the user to decrease server bandwidth.
11. Update your version of WordPress.
12. Use text or link advertisements as opposed to image ads.
13. Set your image dimensions.
by ThinkCode | Aug 6, 2015 | Wordpress
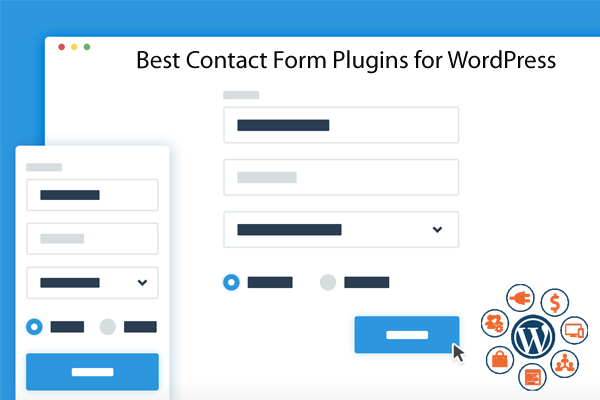
1. Contact Form 7
Simple, flexible and popular, Contact Form 7 has been downloaded nearly 1+ million times by WordPress website users. This contact form plugin lets you customize form fields, appearance, and mail contents. You can create multiple contact forms and insert them on any page or post.
Contact Form 7 supports Ajax-powered submitting, Akismet, and CAPTCHA spam filtering, and is available in multiple languages.
2.Fast Secure Contact Form
This powerful form builder is versatile and easy to use. The Fast Secure Contact Form plugin lets you add, remove, and reorder fields, permits custom field creation, and allows comm enters to send emails automatically. You can also create multiple forms and redirect users to any URL you choose after the message is sent.
Fast Secure Contact Form provides automatic spam comment protection with built-in Akismet and CAPTCHA support.
3. Jetpack Contact Form
If you don’t already have Jetpack installed on your website, you may want to consider using this plugin. It offers many of the features built into WordPress.com websites that aren’t automatically included for self-hosted WordPress sites – stats, social comments, extra widgets, post sliders, email subscription tools, and much more.
4. Custom Contact Forms
This intuitive and highly customizable plugin, Custom Contact Forms, is packed with features and is extremely user-friendly, giving you all of the benefits of CSS customization without having to know CSS. Most features are drag-and-drop or dropdown menu selections, and there are plenty of options to choose from.
Custom Contact Forms let you:
- Customize size, colors, borders, padding, margins, backgrounds, and more for your contact forms.
- Add, remove, and rearrange fields, including custom created fields (text, text area, checkbox, and dropdown)—unlimited numbers of fields are permitted.
- Create an unlimited number of forms and set a different destination email for each one.
- Set required fields and optional fields.
- Display forms in pages, posts, and theme files.
- Redirect to any URL, including a Jquery form thank you message or a custom thank you page.
- Enable CAPTCHA or “Are You Human?” spam comment blocking support.
There are many more features with Custom Contact Forms, including a custom HTML feature for developers to further tweak the design.
5. Slick Contact Forms
A widget-based plugin, Slick Contact Forms is a user-friendly way to create contact forms that stand out. You can design floating forms, drop-down buttons, or sticky sliding tab forms, located anywhere on the page. This plugin also handles multiple forms per page for additional effect.
Slick Contact Forms includes several additional features, such as custom redirects after submission, contact form widget options, short codes, and more.

by ThinkCode | Jul 10, 2015 | Wordpress
Given below are the Most Common WordPress Errors
1. How to Fix the Internal Server Error in WordPress.
Another common error that WordPress users may come across is “Internal Server Error”, or sometimes “500 Internal Server Error”. This error usually happens when there is something wrong, but the server is unable to idefntify where the problem is. Since the error message does not indicate where you should look for the error, it pretty much up to you to figure this out. We have compiled a list of solutions that you can try and one of them will help you resolve it.
2. How to Fix the Error Establishing a Database Connection in WordPress.
This error message is clear that your website is unable to connect to the database. However solving this error can be tricky for beginners. Usually this occurs when a user has entered or modified their database credentials (database host, database username, and database password) incorrectly. Sometimes your database server could be unresponsive, or your database may have corrupted. However, most of the time it is usually incorrect database login credentials. Take a look at common solutions for this problem.
3. How to Fix the WordPress White Screen of Death.
This error usually results into a plain white screen with no error message which makes it the most puzzling because you have no clue where to look and what to fix. Most of the time it is caused when a script exhausts PHP memory limit. It can also happen due to a configuration on the server. It is also possible that a user would only see white screen of death on certain sections of their site.
Hope above WordPress Errors will help you while handling with WordPress platform.